Onboard a tenant
This page walks an administrator through the complete golden path: from signing in to the admin console through handing a BI user a ready-to-paste connection string. Each playbook covers the console steps, the equivalent qod CLI command, and how to confirm success.
Sign in
Goal: Open the admin console and authenticate in the correct realm.
Prerequisites:
- The manager is running and reachable at
http://<host>:20900. - You have either superuser credentials (a
qodstate_userrow withtenant IS NULL) or tenant-scoped credentials.
Steps (UI):
- Open
http://<host>:20900/ui/in a browser. - Enter your username and password.
- Leave Tenant ID blank to log in as a system superuser. Fill it in (for example,
acme) to log in as a tenant-scoped user. - Click Sign in.
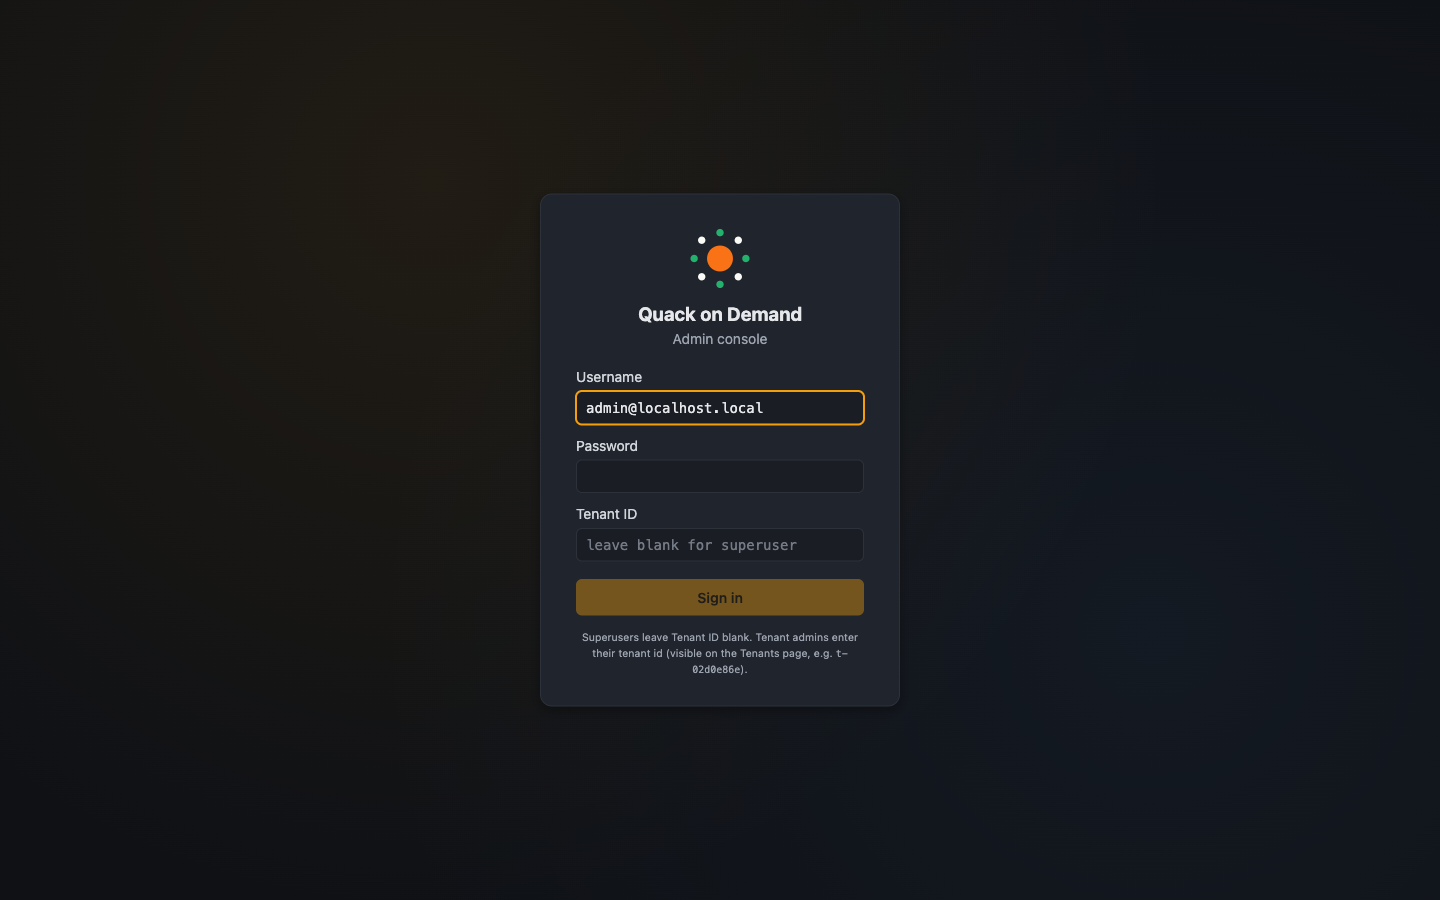
CLI equivalent:
qod login --url http://localhost:20900 --username admin
qod login prompts for the password (never a command-line flag), mints a session, and stores it in the active profile - every subsequent qod command reuses it. CI scripts can set QOD_API_KEY instead of logging in.
Verify: The top-right pill shows the signed-in user and their role. In no-auth dev mode the pill reads anonymous / no-auth.
Related:
- Admin UI guide - Signing in section
- Authentication
Create a tenant
Goal: Register a new isolated tenant namespace in the control plane.
Prerequisites:
- Signed in as a system superuser.
Steps (UI):
- Click Tenants in the top navigation bar.
- Click New tenant.
- Enter a short identifier in the Name field (for example,
acme). The name becomes the routing slug used in connection strings. - Click Create.
The form does not have a dedicated screenshot; it is a single-field dialog on the Tenants list page.
Manifest (YAML)
This is a fragment of the full config manifest; see Manage by manifest to assemble and apply it.
tenants:
  - name: acme
    displayName: Acme Corporation
CLI equivalent:
qod tenant create acme
Metastore settings (database name, schema) are configured per tenant-db, not on the tenant itself - see Add a database below.
Verify: The new tenant appears in the Tenants list immediately after creation.
Related:
Add a database
Goal: Attach a database (tenant-db) to the tenant so pools have a catalog to connect to.
Prerequisites:
- The tenant exists (see Create a tenant).
- Signed in as a superuser or as the tenant's admin.
- For
ducklakekind (the default): the Postgres metastore is reachable anddataPathpoints to writable object storage.
Steps (UI):
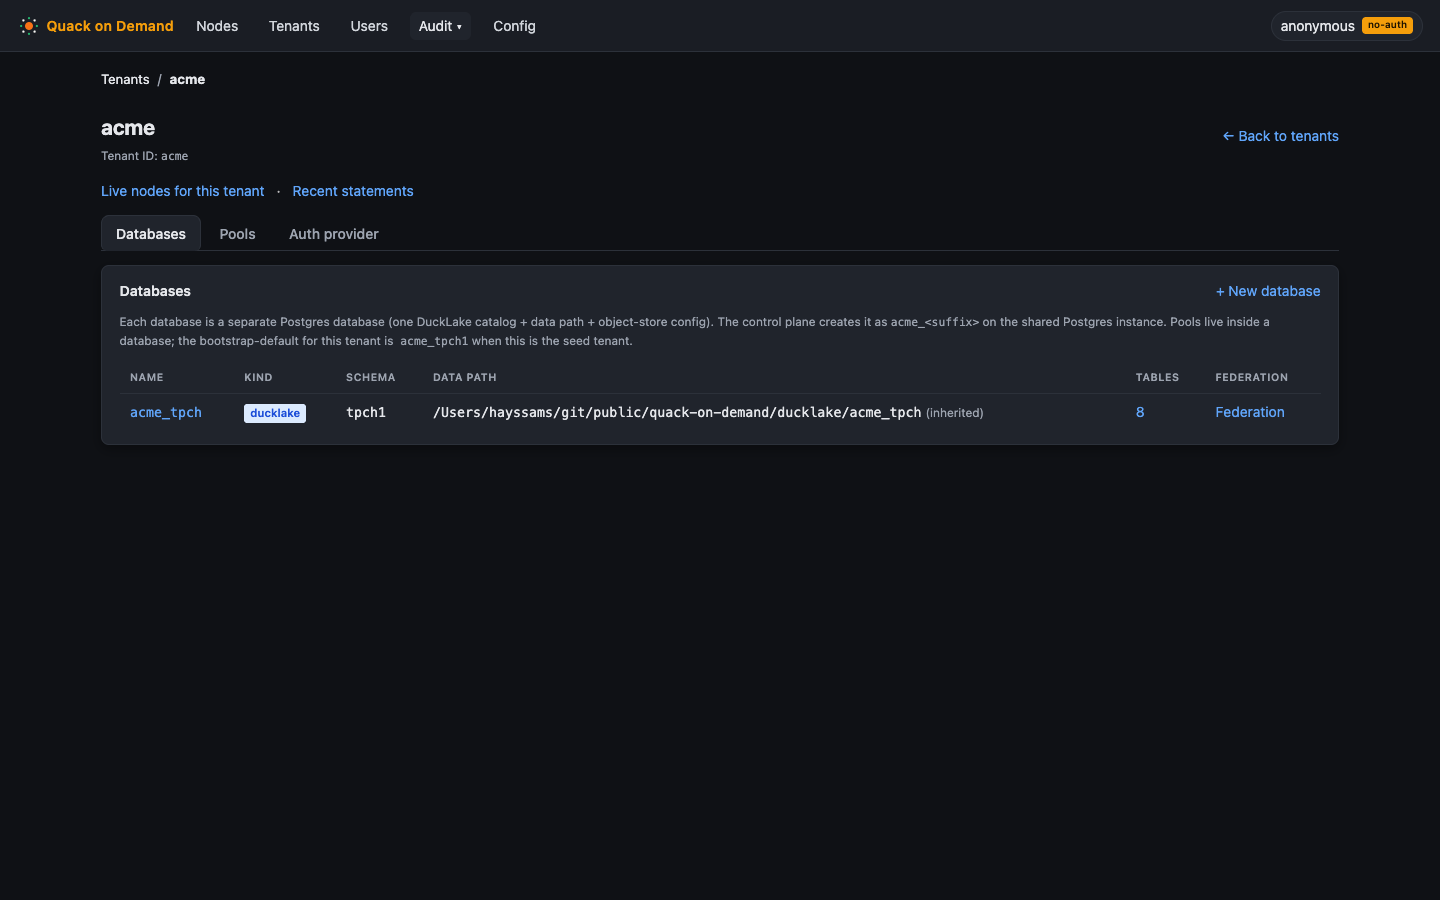
- Open the tenant from the Tenants list.
- Click the Databases tab.
- Click New database.
- Fill in:
- Name - a short identifier for this database (for example,
main). - Kind -
ducklakeis the default for production multi-node persistence;duckdb-filefor a local file;memoryfor federation-only workloads. - Data path - the object-store URI (for
ducklake) or file path (forduckdb-file); leave blank formemory. - Default schema - the schema presented to clients when none is specified.
- Name - a short identifier for this database (for example,
- Click Create.
Manifest (YAML)
tenants:
  - name: acme
    tenantDbs:
      - name: fed
        kind: memory
        defaultDatabase: fedpg
        defaultSchema: public
CLI equivalent:
The example below creates an in-memory database. Replace --kind memory with --kind ducklake (the default) and supply --data-path for a production tenant-db.
qod database create --tenant acme --name fed --kind memory \
  --default-database fedpg --default-schema public
Verify: The database appears in the Databases tab with its kind and default schema displayed.
Related:
Create and size a pool
Goal: Spin up a pool of Quack nodes bound to a database so clients can connect.
Prerequisites:
- The tenant and at least one database exist.
- Signed in as a superuser or the tenant's admin.
Steps (UI):
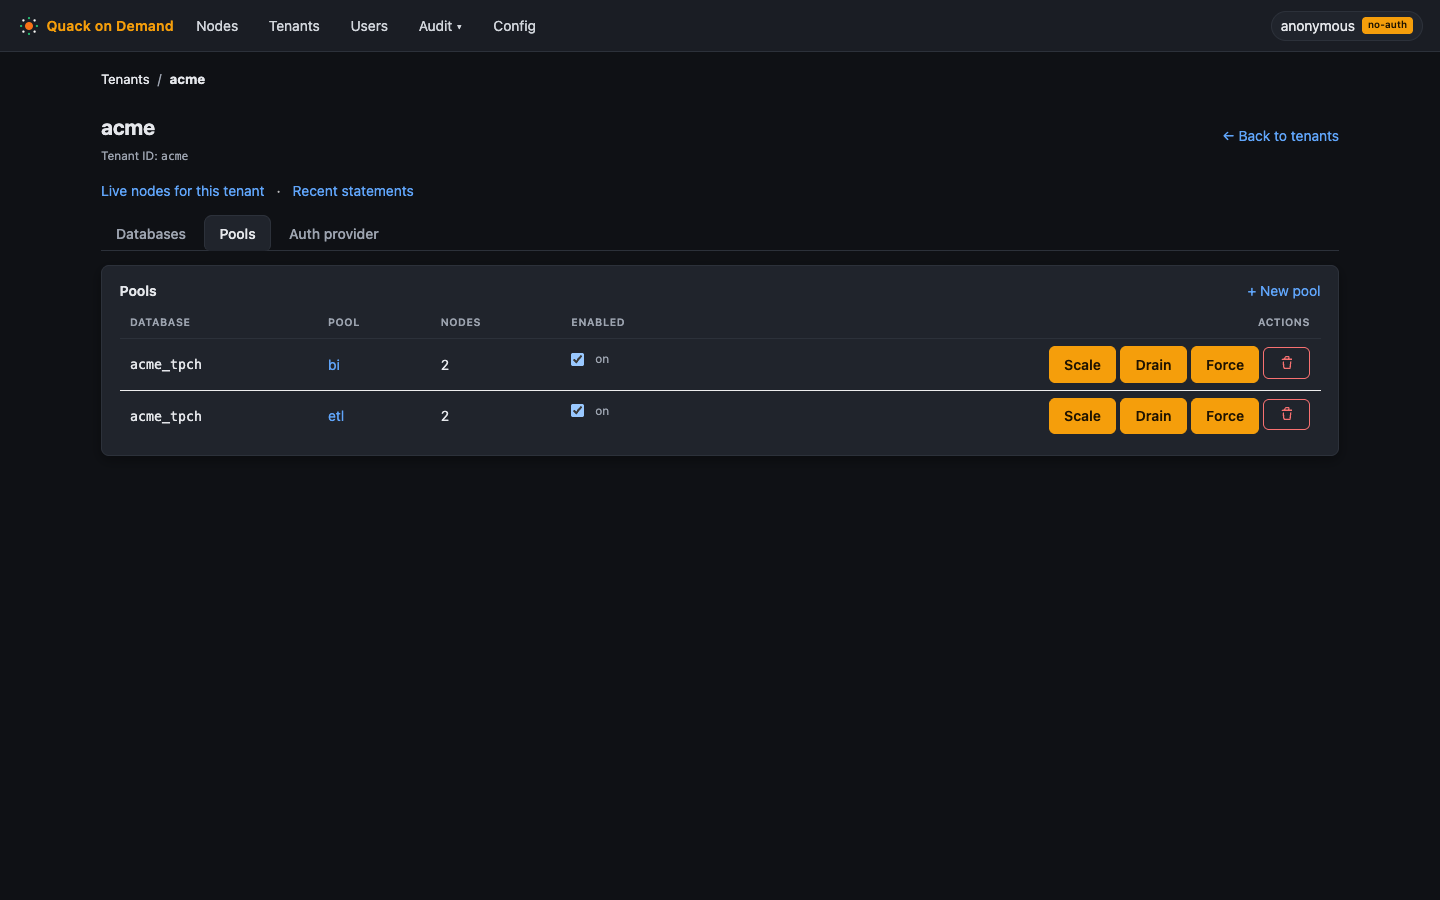
- Open the tenant from the Tenants list.
- Click the Pools tab.
- Click New pool.
- Fill in:
- Pool name - a short identifier (for example,
bi). - Database - select the database this pool should serve.
- Role distribution - set the counts for Write-only, Read-only, and Dual nodes. The total becomes the pool size.
- Create disabled (optional) - check this to register the pool without immediately spawning nodes.
- Pool name - a short identifier (for example,
- Click Create.
Manifest (YAML)
tenants:
  - name: acme
    pools:
      - name: bi
        tenantDb: acme_tpch
        roleDistribution: { writeonly: 1, readonly: 1, dual: 1 }
CLI equivalent:
# Create a pool (1 WriteOnly + 1 ReadOnly + 1 Dual = 3 nodes)
qod pool create --tenant acme --db acme_tpch --pool bi --size 3 \
  --writeonly 1 --readonly 1 --dual 1
Verify: The pool row appears in the Pools tab and the node count starts incrementing as nodes come up. You can watch the progress on the Nodes tab.
Related:
Confirm nodes are live
Goal: Verify that every expected node is healthy and accepting traffic before handing off the connection string.
Prerequisites:
- The pool was created and nodes have had time to initialize (usually a few seconds on a local deployment).
Steps (UI):
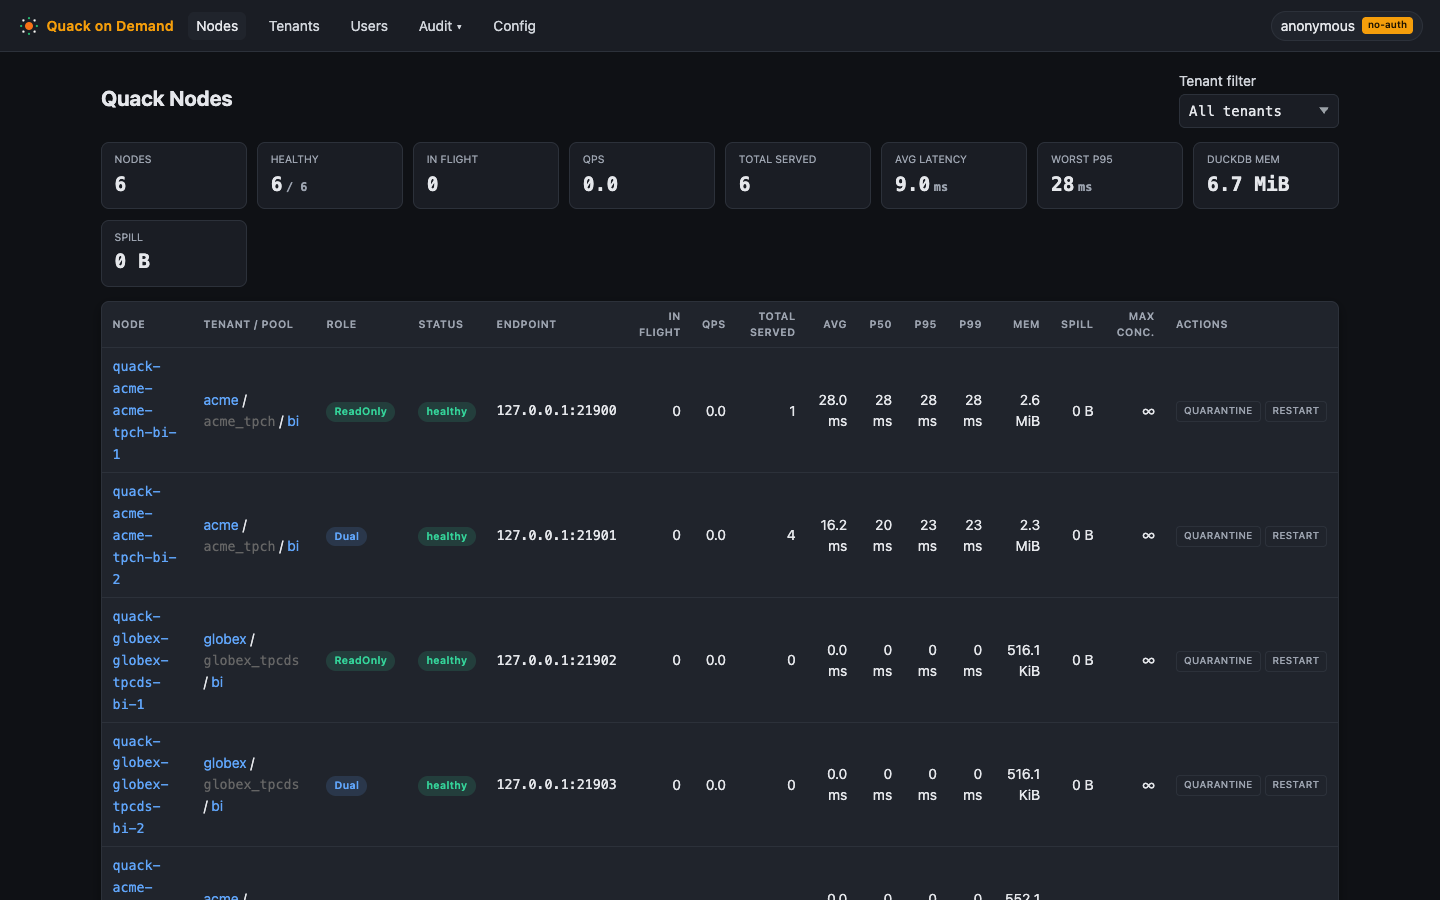
- Click Nodes in the top navigation bar (or open the tenant and look at its live-node table).
- Locate the pool's rows in the Nodes table.
- Check that each node shows healthy = true and that the in-flight and total-served counters are updating.
CLI equivalent:
# Live node table (used by the UI)
qod --json pool list | jq -r '.pools[].nodes[] |
  "\(.nodeId) role=\(.role) healthy=\(.healthy) served=\(.totalServed) p50=\(.p50Ms) p95=\(.p95Ms) p99=\(.p99Ms)"'
Verify: The number of healthy rows for the pool matches the role distribution you configured (write-only + read-only + dual = total size).
Related:
Hand off a connection string
Goal: Give the BI user or developer a ready-to-paste connection string for their tool.
Prerequisites:
- The pool is live and at least one node is healthy (see Confirm nodes are live).
- The end user has credentials for the tenant (see Access control for how to create user accounts and grants).
Steps (UI):
- Open the tenant from the Tenants list.
- Click the Pools tab, then click the pool name to open its detail page.
- Click the Connections tab.
- Copy the JDBC, ODBC, or ADBC connection string that matches the client tool.
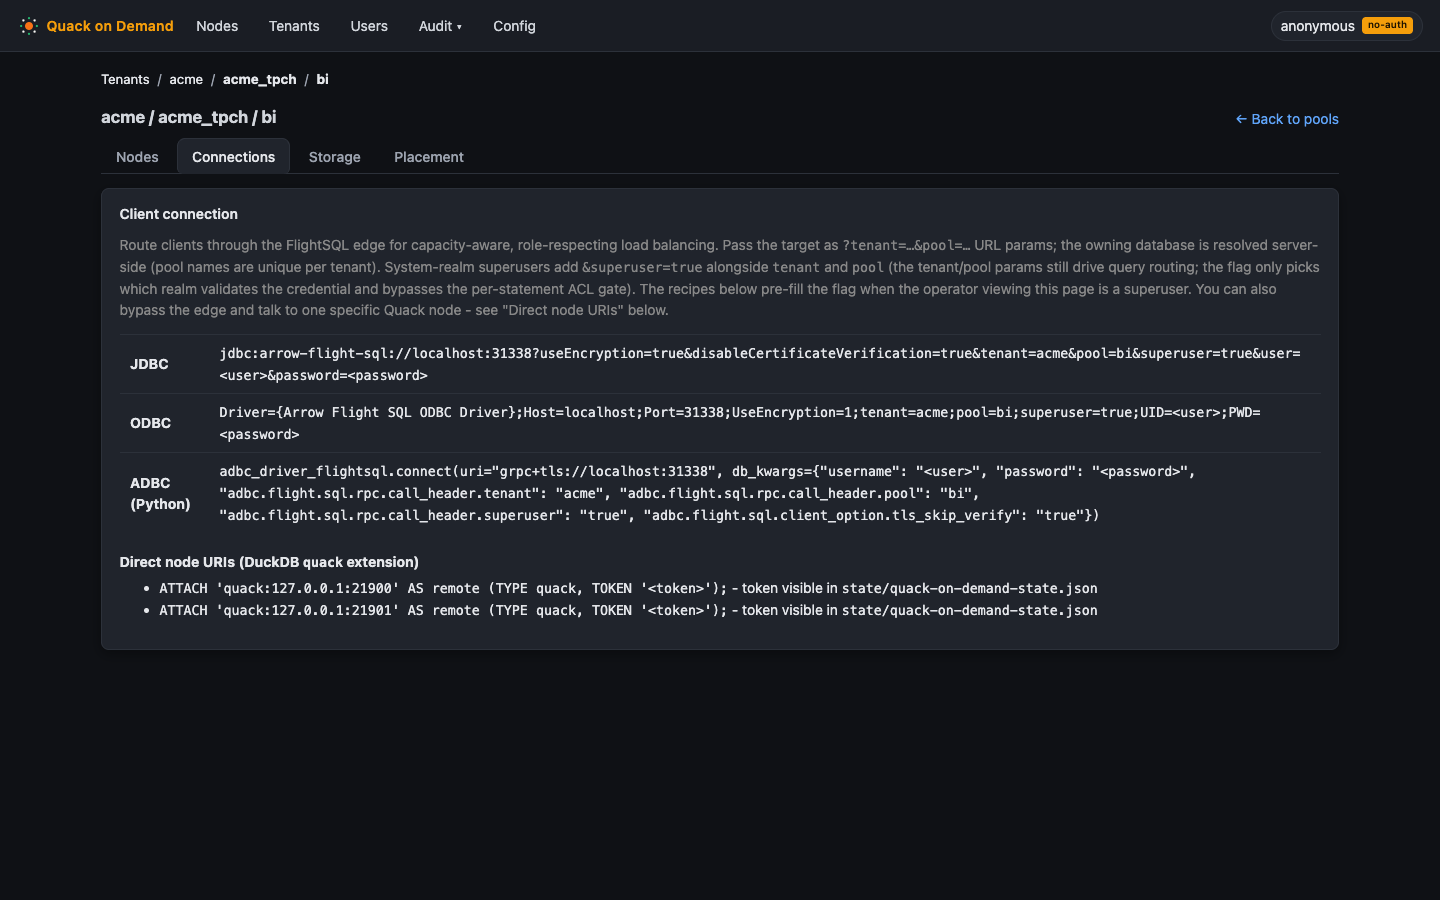
CLI equivalent: There is no CLI equivalent for this step. The Connections tab is a UI convenience that assembles the string from the pool's host, port, tenant, and pool name. The underlying parameters are available from qod --json pool list.
Verify: The BI user connects successfully. For client-specific setup steps, see the client guides listed below.
Related: